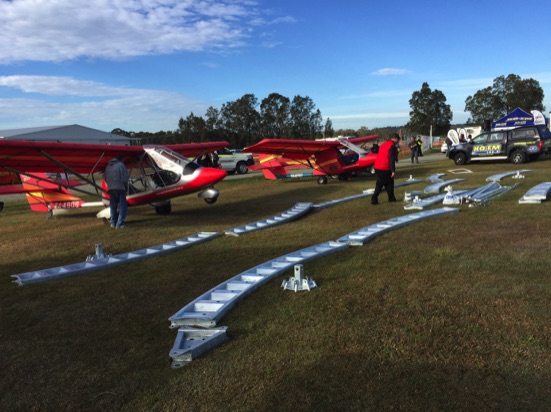
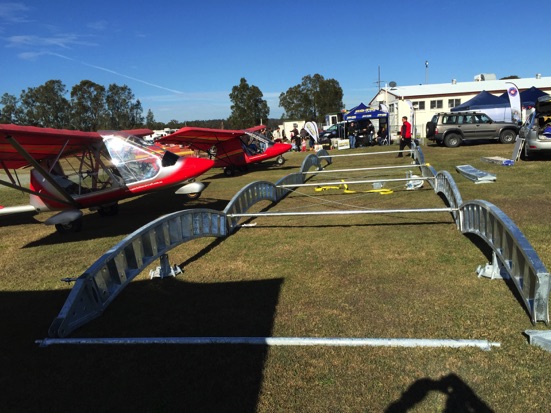
STEP 2. Once you have prepared your footing as per grid supplied, lay out the R1 and R2 sections as required for the span.
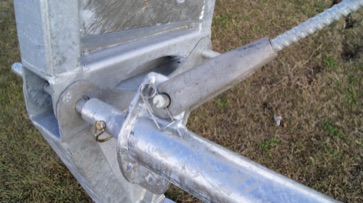
STEP 3. Connect R1 section to the far right (or left) footing, and connect the remaining sections with the joining spars (which join the tops of sections) and add the cross bracings.
CONSTRUCTION METHOD
To show how easy it is to construct the RapidBuilt Shelters, we installed 1 x section of a 13 meter RapidBuilt Shelter (without Colorbond) at the Hunter Valley Airshow Spectacular at Rutherford Airport on 4th and 5th July 2015.
The beauty of the RapidBuilt modular shelter system is that you can generally assemble your project in a day (preferably with the help of some mates), or we can arrange assembly for you.
STEP 1. THE MOUNTING SYSTEM - You have a choice of mounting systems, the temporary mounting (as we used for the airshow), the earth mount (with a steel 30cm disc imbedded into a 1.6 meter hole), or standard concrete footing.